If you have a website, and you are serious about understanding your users and tracking your metrics, Google Tag Manager is one of the most effective tools for doing just that. With GTM, you can easily set up tags to help you track what users are doing in your website.
The basic set up only requires having a script to run Google Tag Manager. Once you implement it, you can track most of the interactions on your website.
Do you want to know how many people scrolled more than 50% of your page? Which form generates the most leads? These are just a few examples of what can be achieved using this tool.
Part I. How does Google Tag Manager (GTM) work?
1 - Decide what action to track and set up your tag:
Basically, you create a tag which represents the action you want to track. Let’s presume you want how many people subscribed using a pop-up on your website. The tag we will create, in this case, must send us an alert (called events in GA4), every time a user submits a form.
2 - Set up the condition to fire your tag with triggers:
GTM calls the condition to fire a tag “trigger”. Once the condition is met, GTM sends the information to Google Analytics or whatever tool you want to send the data to. In our previous example, the condition is each time a user submits a form.
3 - Send additional information with data layers:
Let’s say your form has a dropdown with the services you offer. You want to know what is the most popular service your clients click on. You simply create a variable with the data you want to send to your Google Analytics account, in our case, this will be a variable that we can call “selected_service”.
Now, the question is where to get the information you need. Enter the data layer…
The data layer is simply a bunch of lines of code where you can store and access the information you need.
To sum up this part, tag manager relies mainly on three variables:
Tags : what action you want to track ?
Trigger: which condition should you use to trigger the tag ? ( a click on button, display of a form, etc.)
Variables: do I need more information about the action I’m tracking (a service the user selected from a dropdown, the total price of an order, etc.)
Let’s see an actual example to set up our first tag. If you already have a GTM account you can skip to the tag implementation section.
Part II: Setting up Google tag manager (GTM) account :
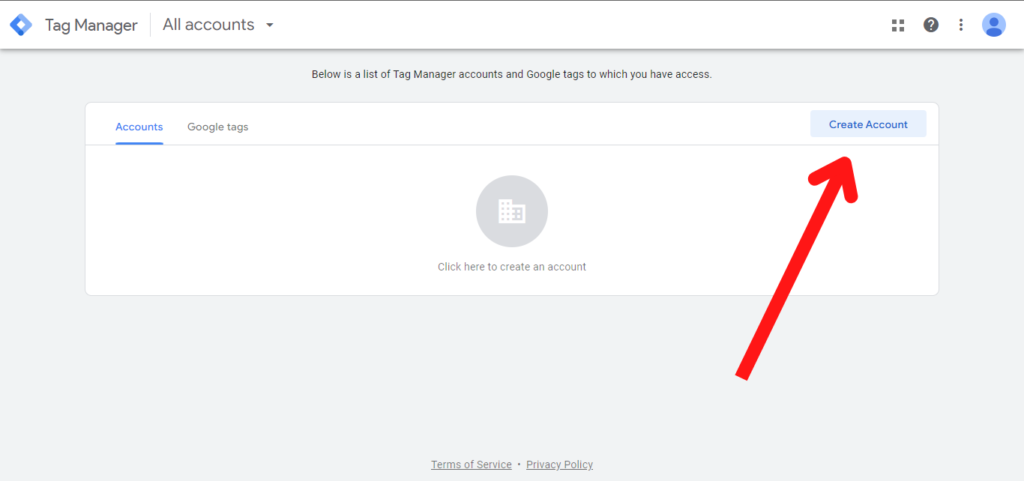
Create your GTM account:
Go to the tag manager home page to start setting up your account.
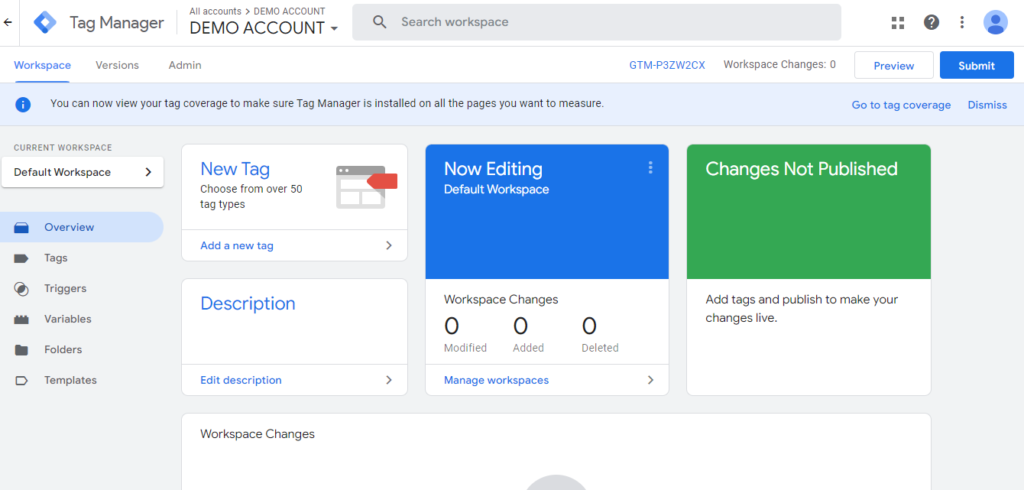
Once you enter the account information, you will land on a page similar to this. Don’t worry if the layout is a bit different. GTM updates its dashboard quite often.
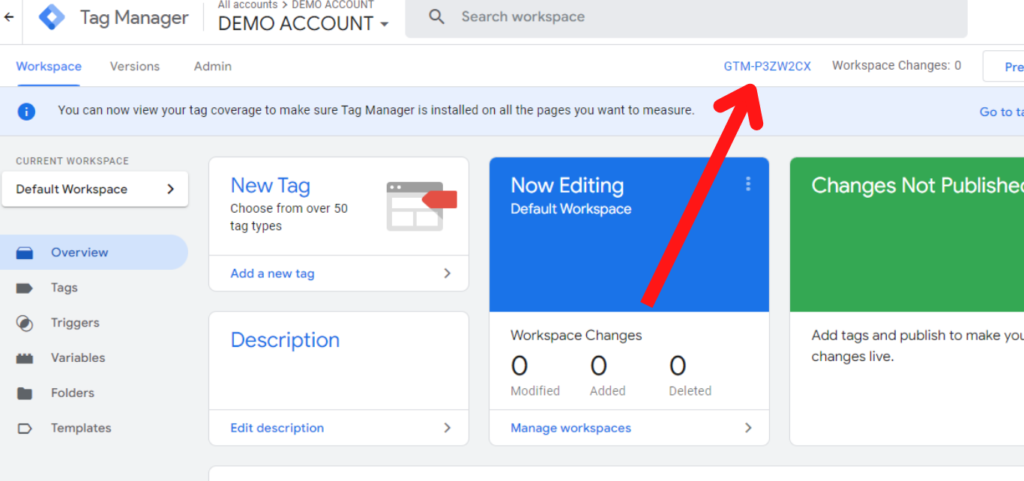
Adding the script to the website:
Next, click on the id in the right corner of the upper menu of your workspace (it starts with “GTM-”).
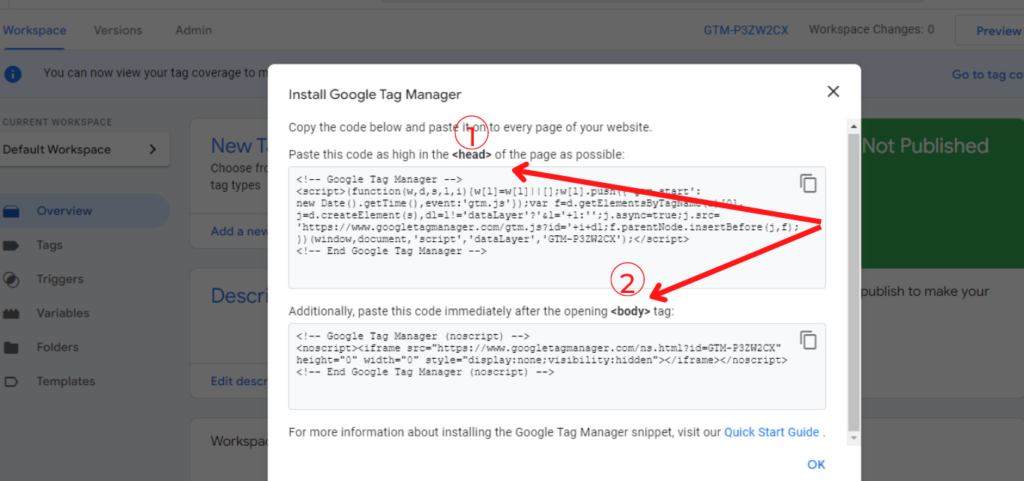
This will open up a screen containing the snippets we need to add to our website to connect it with GTM.
If you have access to a developper you can ask him to set up this part for you.
Now after the container is added, we can check if GTM is working properly on our website.
Testing GTM on the website :
After setting up our tag, lets preview the container (by clicking on “Preview”) and see what shows up on the screen:
The small tab on the left indicates that the Tag Manager is active on our website. In the Debug view, you can see the elements that the container has successfully loaded.
Now it’s time to set up our first tag.
Part III: Setting up the first Google Tag Manager tag
Choose the tag :
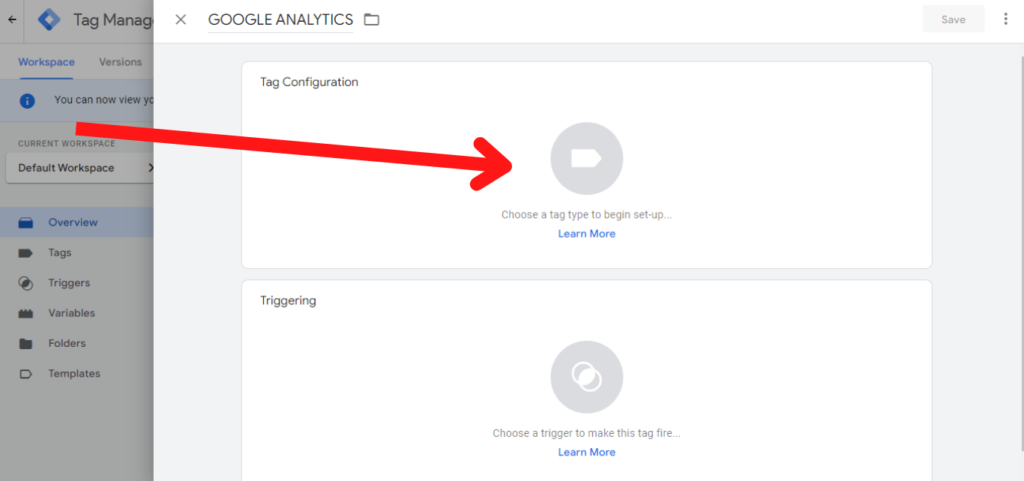
We are now ready to create our first tag. Go to the dashboard and click on create a new tag.
Click on choose your tag.
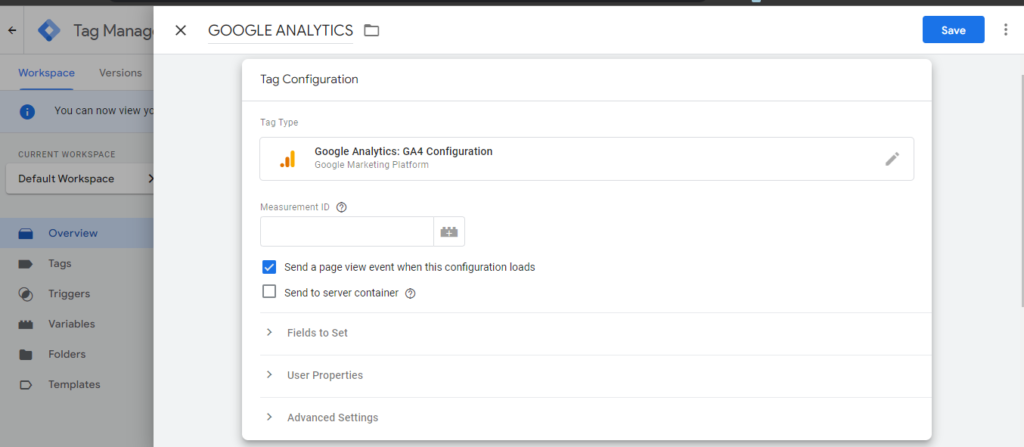
Add the Google Analytics GA4 configuration tag.
Now let’s add the ID. In order to find it, go to your Analytics account and search for the term “id”.
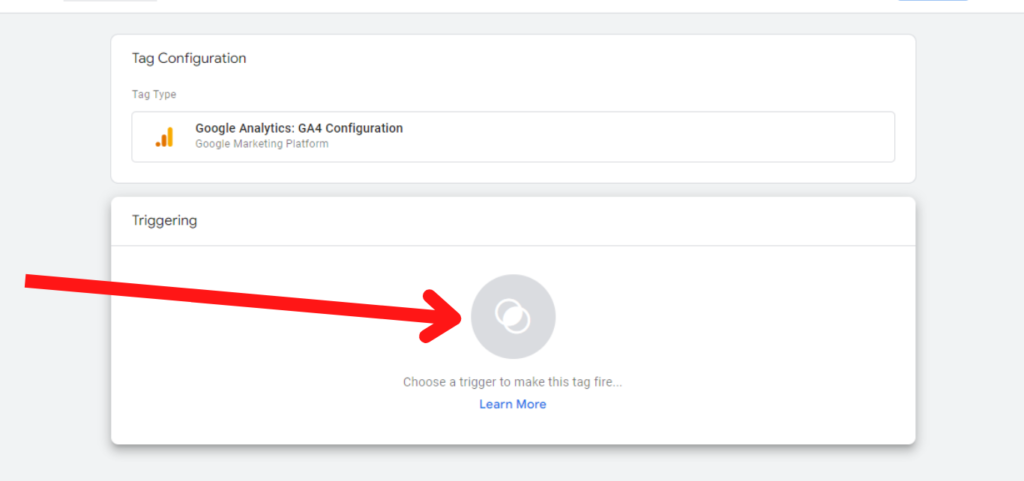
Copy the id and add it to the gA4 configuration tag. Now it’s time to add our trigger that we are going to use to fire our tag.
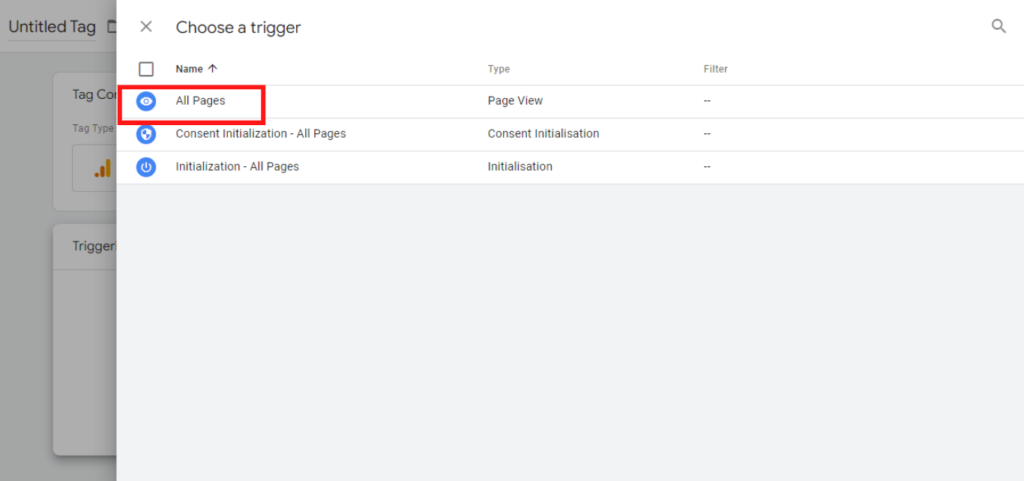
Add the trigger :
Since we are trying to add analytics to all the pages in our website, we are going to fire the tag on all the pages.
Let’s give our tag a name, for example “GA4 installation” and save it.
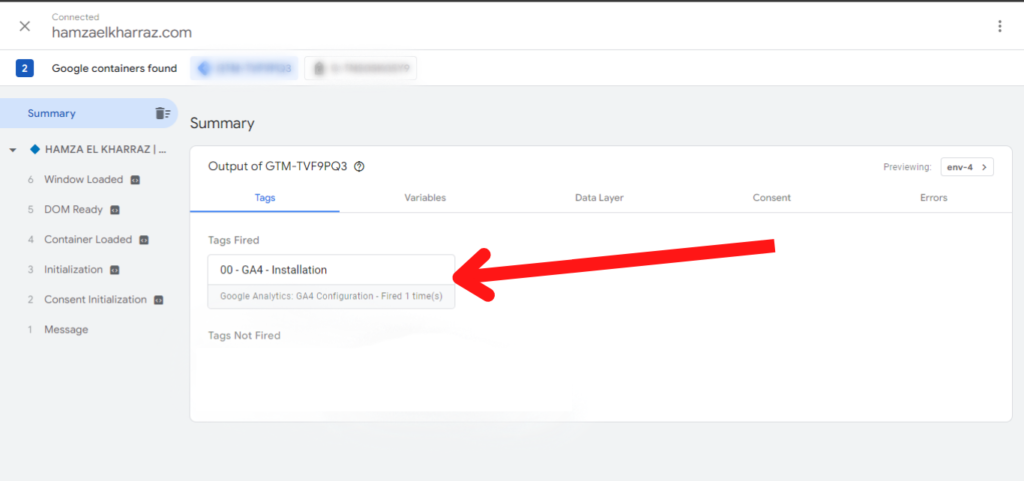
We are almost done. We need to make sure that the tag we created is firing properly on our website. Let’s check using the GTM preview mode.
We can see that the tag is working as expected. Let’s head back to our dashboard to publish the tag and start sending data to Google analytics.
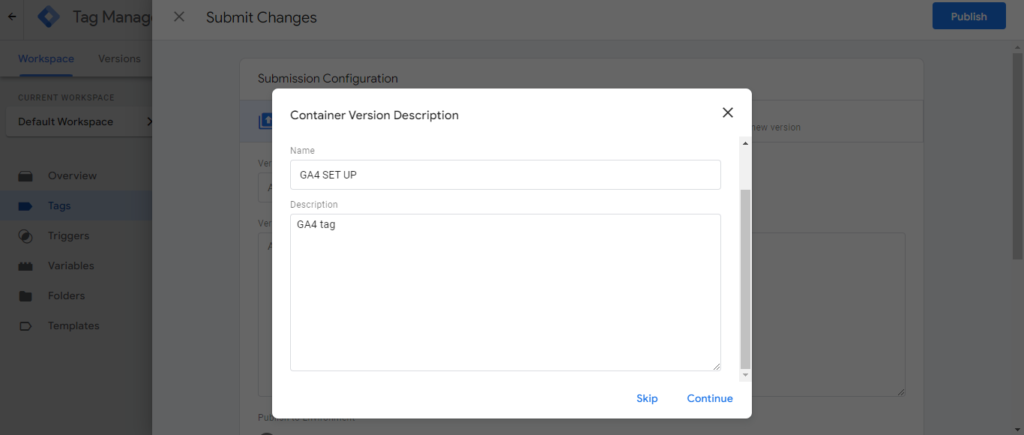
Give the version that you will publish a name and a brief description.
Congratulations! You published your first tag.
What’s next?
Setting up your first tag is but a first step in your data tracking journey. If you are interested in setting up advanced tags, receive notification every time I add a tracking related article.